Getting started with blogging using GitHub pages and Jekyll
View on GitHubFinding somewhere to post your content, be it pages, blogs or material can be a tough decision these days. There are many options, most of which require you to pay upfront to use the service, while others lure you in with a free trial hoping that you will stay after the amount of effort you have put in to get things set-up.
TL;DR;
- Create your GitHub Pages repo
- Configure the repository for GitHub Pages use
- Create your first post
- Update page to list posts
- Check-out your site online
- (optional) apply default GitHub Pages template
A small personal history (feel free to skip if you wish)
In my own journey, I started with Community Server by telligent (now Community Platform) with Microsoft and the XNA-UK crowd (XNA, gone too soon), I even hosted a Community Server site (for free) for a charity, as a content, news and communication platform it worked well. I then migrated my blog to wordpress and things were fine for a time, there was blogging, forums and a host of other useful tools, however, self-hosting wordpress became slower and slower and eventually became swamped by ads.
I then took a week and migrated to Ghost, which proved troublesome to self-host, was prone to dropouts and while it looked great, it just was not working.
I had courted the idea to look at GitHub pages but did not really invest any serious time into it until recently, and this is where our GitHub and Jekyll journey begins.
What are GitHub pages?
At its core, GitHub pages is simply a way to host web content inside a GitHub repository and have it accessible as a webpage. Just a free web hosting site for your content.
Most websites are maintained in some sort of source controlled repository, so why not also publish your site there?
With the addition of Custom Domains (the ability to point your own custom URL to your site) available for free and using HTTPS by default, there is very little reason not to.
What is Jekyll?
Hosting a site is one thing, but not everyone wants to be writing HTML and styles all day and this is where Jekyll comes in. Jekyll at its core is a way to turn files written in Markdown, which is a simplified documentation style that GitHub already supports, into static web pages.
Pro Tip - check out the Markdown Cheat Sheet for a great reference for writing the best markdown.
GitHub hosts Jekyll internally and it is what GitHub uses to show markdown pages in its interface, so you will have already seen it in action.
Setting up your GitHub repository for your pages
GitHub requires a repository set-up with a specific name to give you a website that directly points to your site, this is named as:
<GitHub Username>.GitHub.io
Any other variation will create an alternate endpoint, this still works but could cause issues depending on how you set your site up
Address for any other repository name:

https://<GitHub Username>.github.io/<Repository name>/
So simply browse to GitHub (create a new account if you do not have one already) and create a new repository using the naming convention above, for me this was:
The site also HAS to be a Public repository. There are was to get private repositories to work, but you will have to spend money and upgrade your GitHub license/subscription.
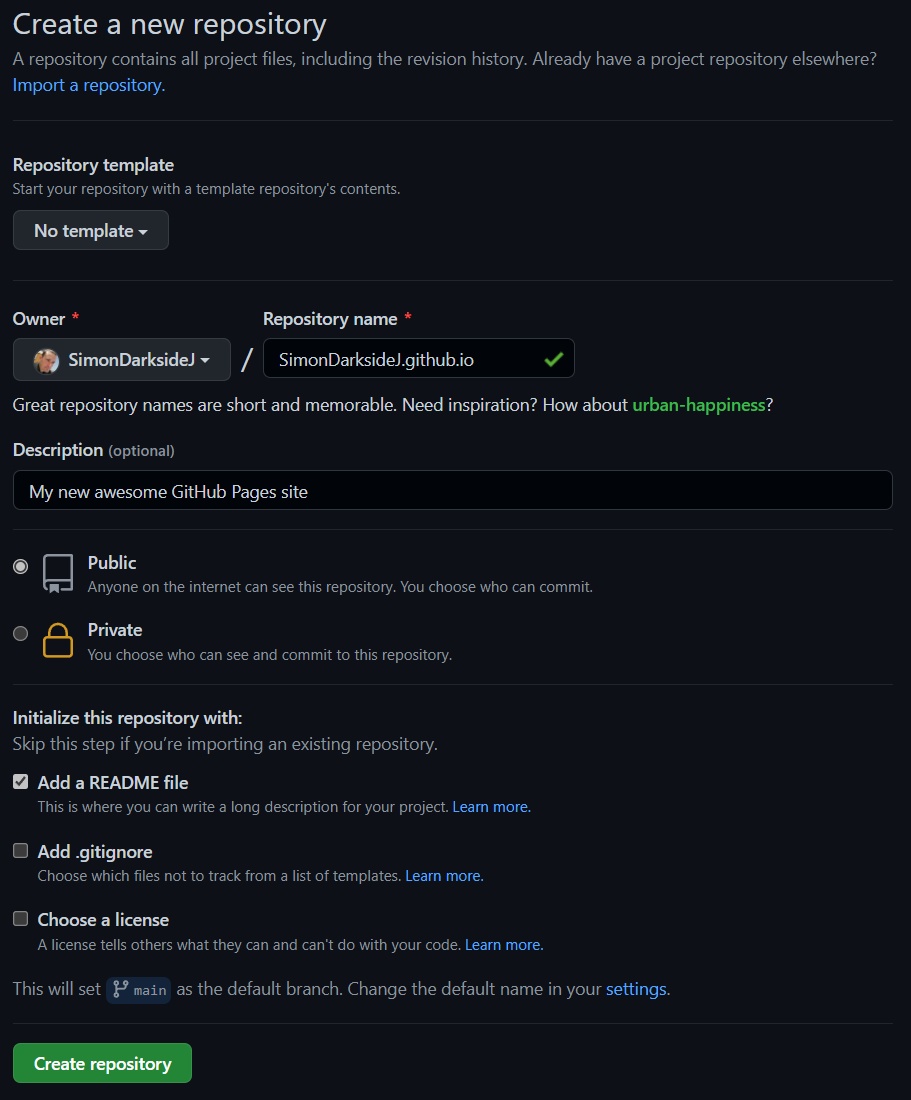
Make sure to add the default “README” file, which will be the start of your blog with no posts.
Activating GitHub Pages
With your site created, all that is left is to enable GitHub pages for your site, this can be found in “Settings -> Pages” in the menu when looking at your <Code> tab in your repository:

And then selecting the “Pages” option in the left tab. Once selected, select a Branch for your source (this defaults to “None”) which should be the “Main” branch by default, to activate pages.
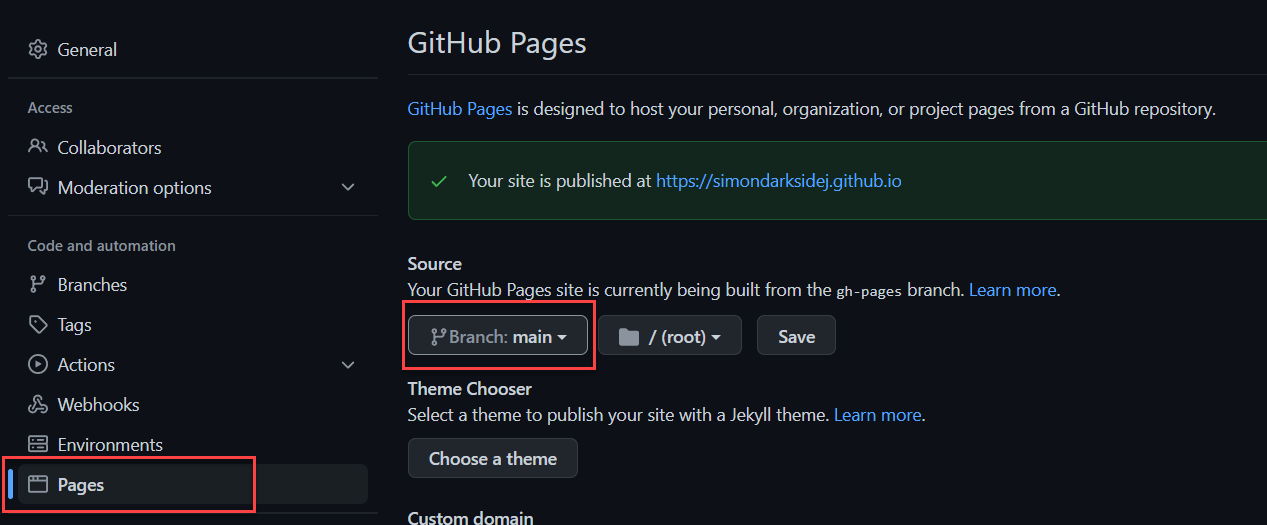
Provided everything is good, the highlighted section at the top should turn green and clicking “Save” will activate your page and give you a link directly to it.
It can take a few minutes for your page to activate, so be patient.
Adding content
Now things start to get interesting, as the GitHub space has evolved to make our lives a lot easier. In the past you had to set-up your PC, then copy your site to your machine, start adding/changing content and then uploading it back to GitHub, BUT NO MORE.
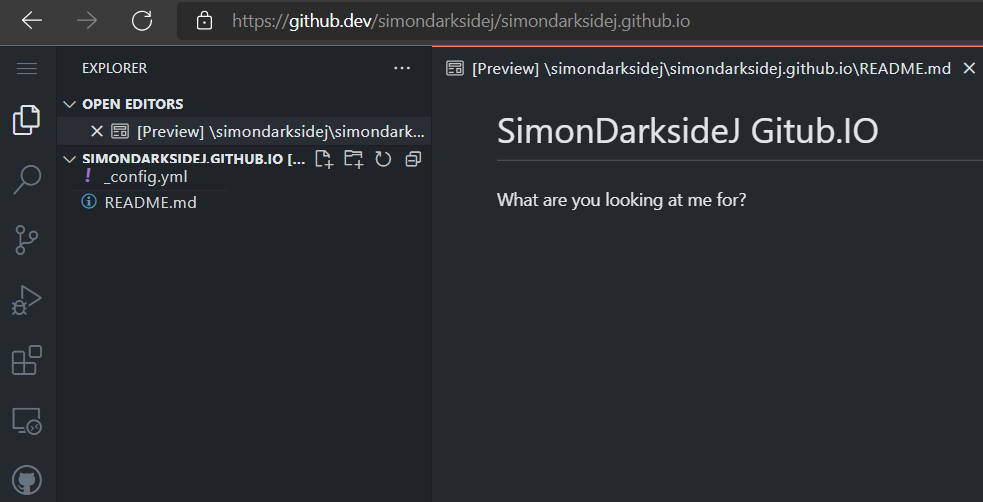
GitHub now provides a web interface for managing and editing your repository, it does not do everything, but it does enough that for most use-cases you will not need to use anything other than a web browser.
To activate the GitHub Web editor, simply:
Hit the “.” key on your keyboard while looking at the “Code” page on your repository
Or change “.com” to “.dev” in the address bar, e.g. “https://github.com/SimonDarksideJ/…” -> “https://github.dev/SimonDarksideJ/…”
Granted you must have editing rights to the site in question to make changes, but this also works for viewing any repository
Creating your first page
To create your first post, we need two things:
-
A directory called “_posts”
(obviously you only need to create this the first time)
-
A markdown file for your post.
To create the directory, simply click on the “new folder” icon and name it “_posts”, then hit “enter” to save it.
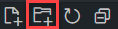
Then select that folder in the list and click on the “new file” button to create a new file.

You will then have to enter the name of the file according to a specific pattern, as follows:
Year-month-day-YourPostName.md
For example
2022-03-07-MyFirstNewAwesomePost.md
Once you are happy with the title, hit “enter” to save it.
You can rename the folder or file after you create it for any reason by simply right-clicking on them and selecting rename.
We have a page, let us start typing.
Configuring your ‘Front matter’
For Jekyll to properly categorize and describe your posts it needs a little “header” (known as Front Matter) section at the top of each file. This gives extra information to the site generator for processing.
Some themes also make use of the Front Matter to theme your post and add other features like browsing the categories or tags. But more on that another time.
Select your new post on the left-hand bar and add the following in the right-hand pane at the top of the file (from line 1)
---
layout: post
title: Blogging Like a Hacker
date: 2022-03-07 22:20:00
category: my category
---
Make sure to leave a space between the parameter (layout:) and the value ( post) or the Jekyll engine will complain and not build your page
You can set these to whatever you like (except “post” leave that alone for now) to best describe your article.
With that set, you are ready to blog. So just leave a space after the Front Matter and start typing and you will have an article in no time.
Pro Tip You can Preview how your page will look online by clicking on the “Preview” button in the top-right hand corner of the screen. You are welcome.

Now save your file and we are on to the last step - saving and publishing.
Committing your changes
With source control, nothing is ever set in stone until you are ready to Commit, same as life really.
With the GitHub web editor, once you have made your changes they are marked as “changed” but have not yet gone anywhere. To see what has changed since you were last editing, click on the “Source Control” button as shown below:
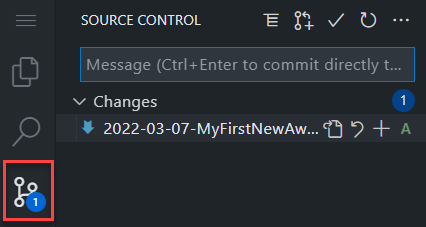
The button also has an icon on it to show how many changes were detected since you last published it.
*Note Until you commit, changes are ONLY on your local machine and can be lost if you clear your browser cache (like not saving a file). So it is best to commit your changes BEFORE closing your browser or switching off your PC.
In a future article, I will also cover creating Drafts that can be saved but will not show up on your published page.
Once you are ready, enter a commit message into the “Message” box, to simply state what has changed, this is more for your own benefit later to remind you what you changed between commits, so do not stress over it.
And with that done, click the Tick button at the top of the screen to save your changes to the server.
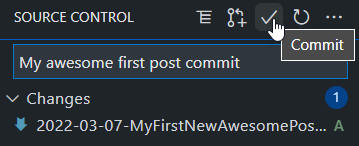
You may sometimes get a warning about staging changes, this simply means you can be selective when committing by only clicking + next to the files you want to save. But I normally just select “Yes” to save all my changes.
And that is it, you are published. If you now navigate to:
https://<GitHub Username>.GitHub.io
As I stated earlier, it might take a few minutes to refresh. If it does not, then it might be an issue with your page, so double-check the preview.
To close the GitHub web editor, either click “Back” on your browser window or close the tab.
Depending on the Theme you selected, the new page will either be listed below your homepage, to the right or you might need to go direct by entering the URL. Play with each theme to see what works for you.
Updating the README to show your posts
As it stands, you have a front page (your README) and your post, but the two are not linked by default, so we will update your README with a little code to simply list links to your posts (its dynamic so you only have to do this once).
When using a proper theme, these will come with capabilities to do this for you. The GitHub default setup and built-in themes are centered around a single main page and you have to add links manually.
It is just a basic simple setup after all
Go back to the Web Editor for your repository (hitting “.” from the Code tab on your repository) and select your README file in your repository.
If you are still on the “Source Control” tab (on the left) then simply select the Explorer view two buttons up, or press “Ctrl + Shift + E”
With the README selected on the left, look at in right-hand pane and find an appropriate area on your page where you want to list your posts and add the following code block
### My Posts

{% for post in site.posts %}
  <article>
    <h2>
        <a href="{{ site.url }}{{ post.url }}">
            {{ post.title }}
        </a>
    </h2>
  </article>
{% endfor %}
All this simply does is list all the files in your “_posts” folder and then creates a hyperlink for each one.
When you “Commit” your changes and your site refreshes, you should see something like this:

Nice and plain, but what about adding a little colour?
Setting a default GitHub Jekyll theme
To configure a theme we need to return back to the “Code” page for your site, either by clicking “back” in your browser or switching back to “.com” instead of “.dev”.
To select a theme for your site go to the “Settings -> Pages” you accessed earlier in the Activating GitHub Pages section. There you will find a “Choose a theme” button under “Theme Chooser”. Once clicked you should see the selection of built-in Jekyll themes GitHub has to offer themes to choose from:
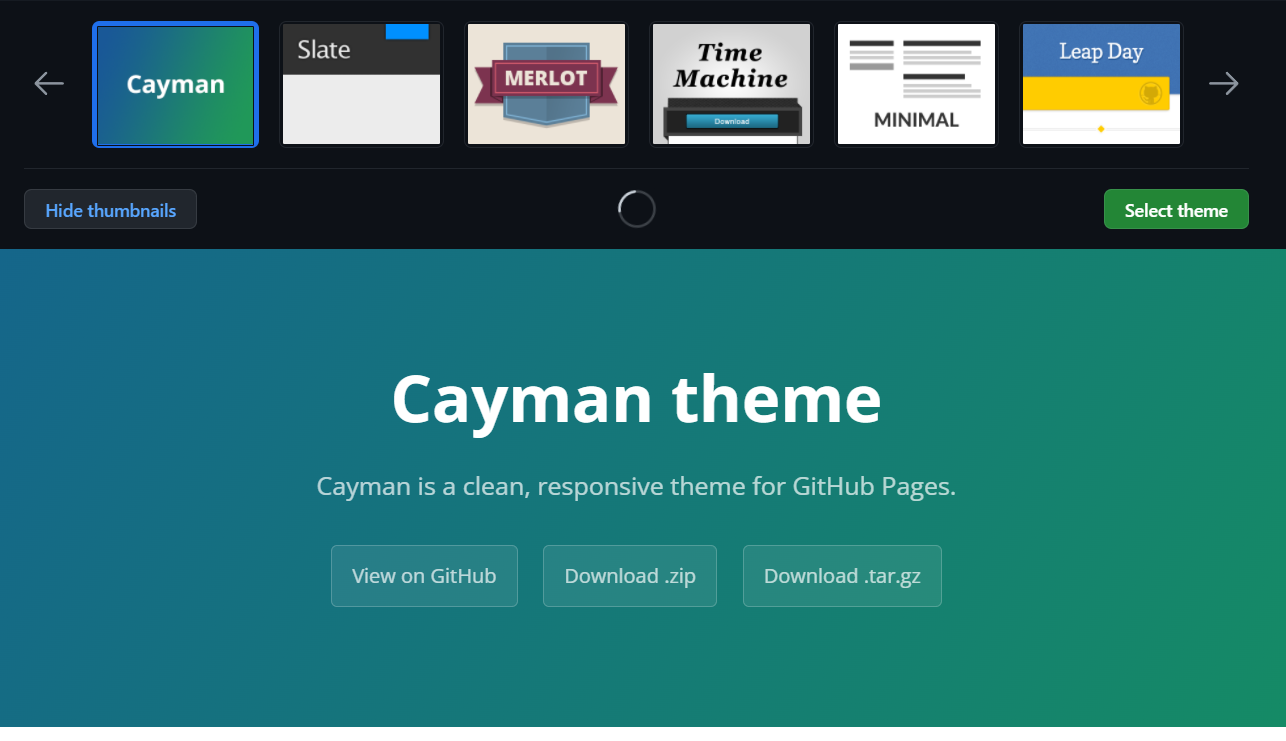
There are about 12 to choose from (at the time of writing) with a few nice variations
There are more themes available but they require a little more effort to install. I will cover how to select and use them in a future article.
We have a site, you can browse to it and see a fantastic “README” page in all its theme glory
You might need to update your readme after setting the theme as it “can” replace your main README.
These themes are very basic and do not offer any advanced features other than styling your pages. In a future article I will cover what is needed to apply an advanced theme to your site.
Conclusion
That is it for the start, further articles will delve into slightly more technical considerations for using Jekyll and GitHub pages for your blogging or presentation site, such as:
- Using custom themes
- Testing your GitHub pages site locally - the right way
- Adding/testing additional features like comments and more
Until then, see you on the flip side