MonoGame, meet VSCode
View on GitHub
TL;DR -> MonoGame rocks and continues to be one of the best open-source frameworks for building games including with lightweight editors like VSCode, on ANY platform.
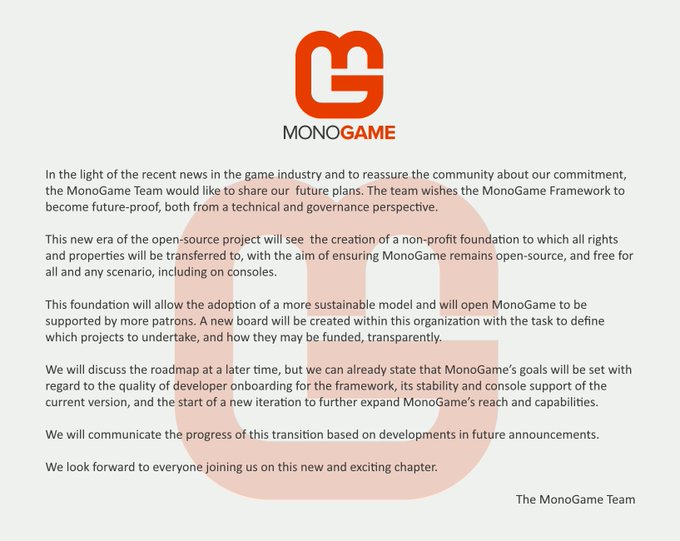
Things are busy and heating up in the Open-Source development space and the MonoGame Team announced their plans to step up to the recent demand.
And as was pointed out to me on the new MonoGame Content Request board that I helped to setup, a fair few developers are asking how to get started. The Videos I did a short while back are still good, but do need modernizing for the latest release and beyond.
A Guide for Setting up VSCode for MonoGame on Windows/Linux/Mac
Kicking things off, right at the beginning, here is a guide to getting started with VSCode for MonoGame. And thanks to VSCode, FINALLY, the instructions are the same for ALL PLATFORMS.

- Starting Fresh
- Installing the Extensions
- The .NET SDK
- Installing MonoGame and creating your new game!
- MonoGame, Start!
- Build and Test
- The Content Pipeline
- Debugging
Starting fresh
To keep things clean, all the instructions here are run from a clean machine, however, if you already have some parts installed, they will be automatically updated, thankfully.
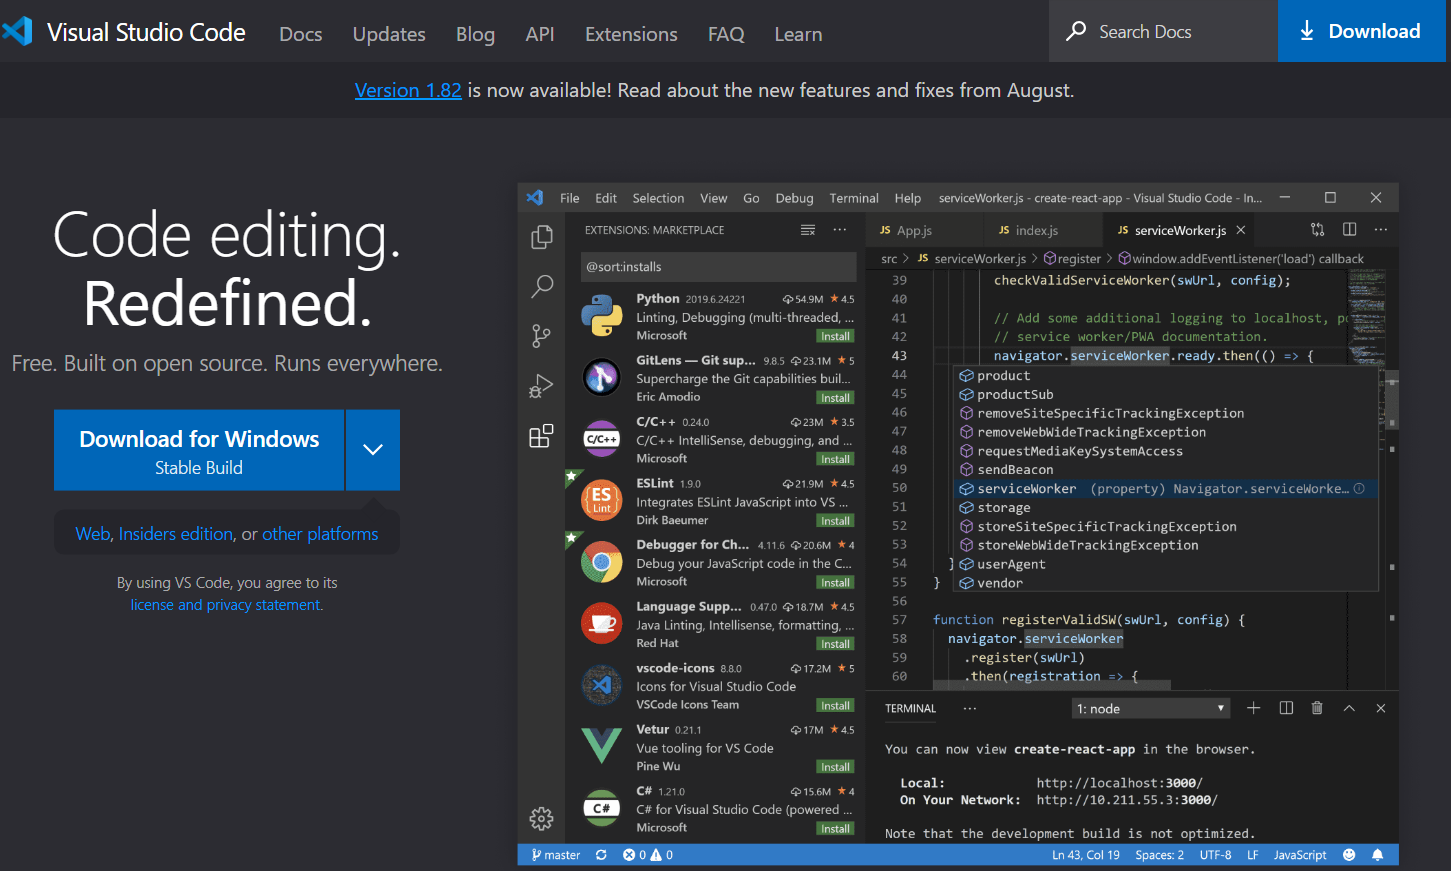
Simply visit code.visualstudio.com and get downloading Visual Studio Code, the drop down button on the left should auto-detect your operating system, or you can click the down-arrow to show the list of platforms to choose from.
One Editor for multiple platforms, including the Web (as in VSCode for the Web on GitHub), however, as far as I know, the web version does not support .NET building at this time.
Installing the Extensions
Now, MonoGame as of 3.8.1.303, is a .NET Runtime framework, this vastly simplifies its installation and use because all aspects are now unified and everything you need to build your games is all built into the .NET SDK.
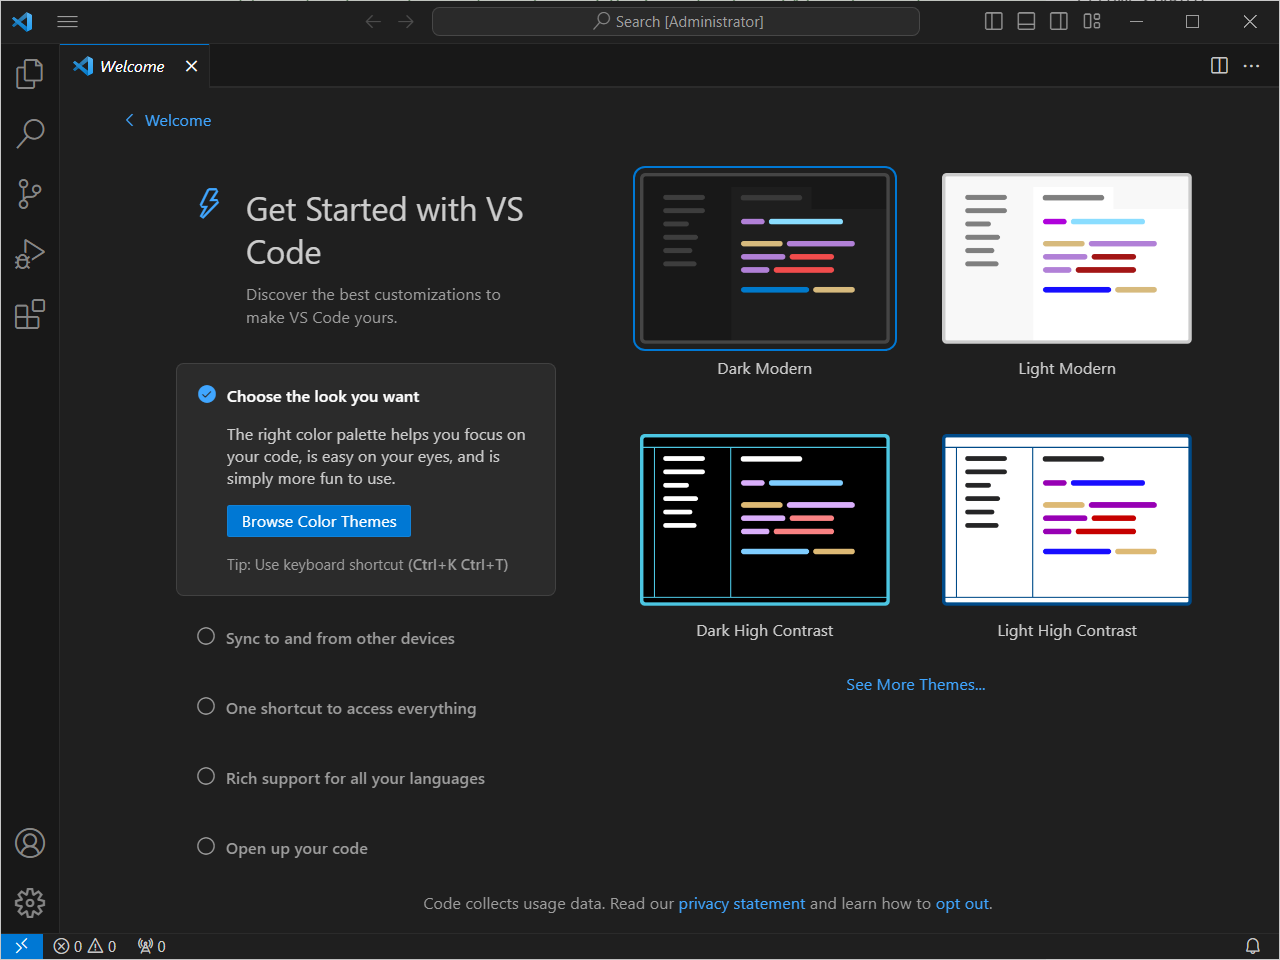
If you open up VSCode after its installation, you should be presented with the above screen, welcoming you to a new world of light, development and if the mood takes you, fun.
But as it stands right now, you only have a fancy text editor (granted a very powerful text editor), where VSCode really comes into its own is with “Extensions”, for which there are extensions for just about any programming language going (within reason, there is no assembly editor, yet). Extensions add things like:
- Compilers for building.
- Intellisense for code suggestions.
- Viewers for specific file types.
- Language understanding and formatting.
- And so much more.
For MonoGame we need two things, the C# Dev Kit (which includes the C# language and some other tools) and the .NET SDK.
Starting off, click the { } in the left-hand toolbar and then search for “dev kit” which should then result in a whole list of extensions and right at the top (hopefully) you should find the “C# Dev Kit” published by Microsoft, as shown below:
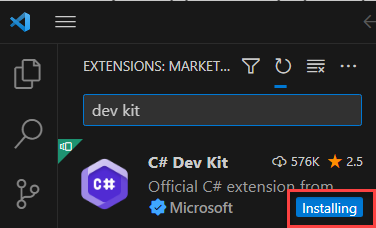
Click on the blue “Install” icon (as indicated in the image) and off it goes.
Some extensions require you to “reload” VSCode after installing/uninstalling, if it does, the Install button will finish with a “Reload” button, click it and VSCode will restart right back where you were as if nothing changed.
The .NET SDK
The .NET SDK (if you are not familiar with it) is simply the latest generation of the .NET Framework SDK, as ever it is backwards compatible and for MonoGame we need at least the .NET 6 SDK (until it upgrades to .NET8).
Thankfully, the .NET SDK is backwards compatible with previous versions, so installing the current version – at the time of writing –, the .NET 7 SDK, will still enable you to develop with MonoGame.
With the “C# Dev Kit” installed, we get a bunch of new commands to use in Visual Studio Code, which can be accessed by pressing:
| Platform | Key Binding |
|---|---|
| Windows | F1 |
| Windows and Linux | Control + Shift + P |
| Mac | Command + Shift + P |
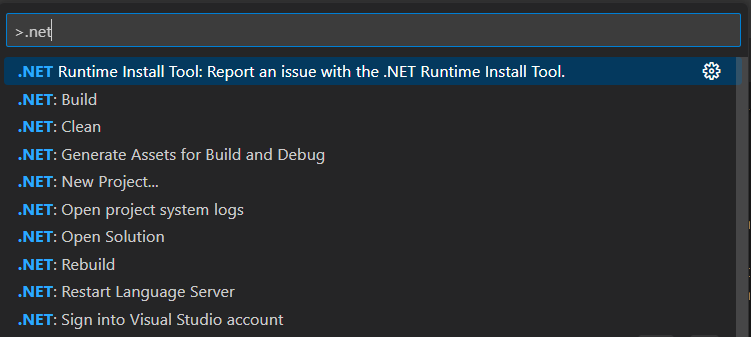
This will open up a bar at the top of the screen with a bunch of commands. It also includes a handy search feature (because there is a command for almost anything), so if you type “.NET”, you should see the following:
If you do not already have a .NET SDK installed, you will be greeted with a nice prompt / warning Window, as shown below:
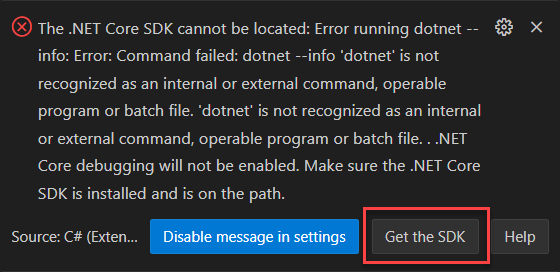
Which is simply informing you that you have something else to install to begin, this is not a VSCode extension and like .NET Framework installers previously, is not something you install in VSCode, but into your system instead. So, click on the “Get the SDK” link (which will open a browser) and you can then download and run the latest .NET SDK installer from there.
> You should also close VSCode at this point, to ensure everything is clean and ready for your return!
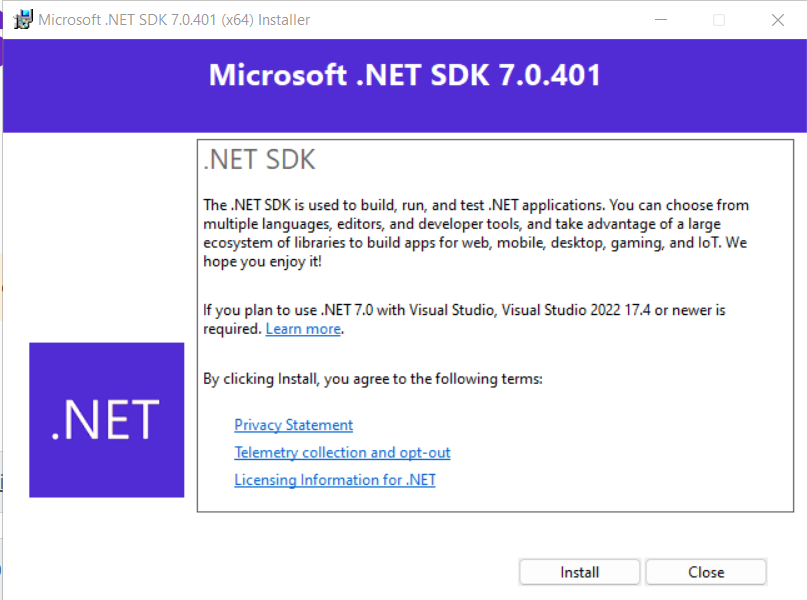
Click Install and follow the instructions (if any) to complete the setup to proceed.
Ok, so you have all the prerequisites installed, what now? Well, we start using MonoGame!
Installing MonoGame and creating your new game!
Let us begin by starting up VSCode again, we get the familiar screen, but not much has changed, we are simply prepared and ready to actually begin using MonoGame, we have the tools so let us begin!
Welcome to the Terminal screen, you will be spending quite a bit of time here. I have often heard that some developers miss a GUI at this point and it is a fair quip, however, The is great because it is the same process on ANY platform, and you may find it more comforting, with the same tools, the same commands and likely the same coffee!
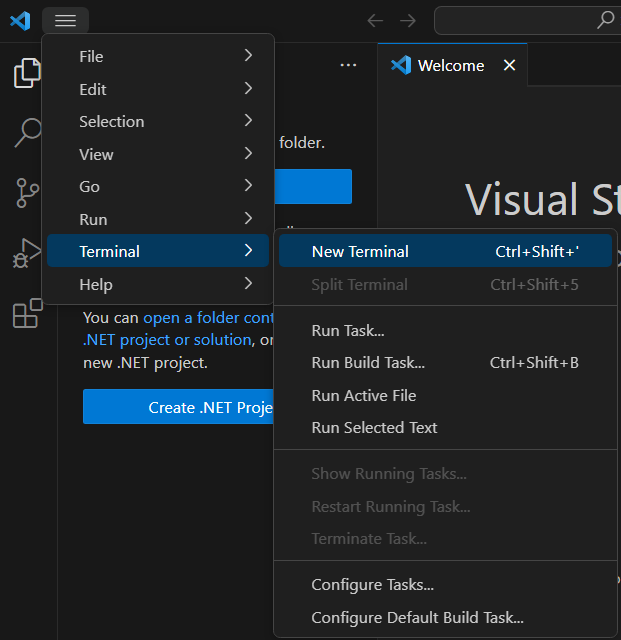
Start up the Terminal Window using the above menu and you will be presented with a Terminal/command-line window ready to process your commands, as shown below:
From here, we are simply following the steps laid out in my previous article and in the MonoGame “Getting Started” guides, first type the following to install the MonoGame DotNet project templates:
dotnet new --install MonoGame.Templates.CSharp
And you should see something like the results below:
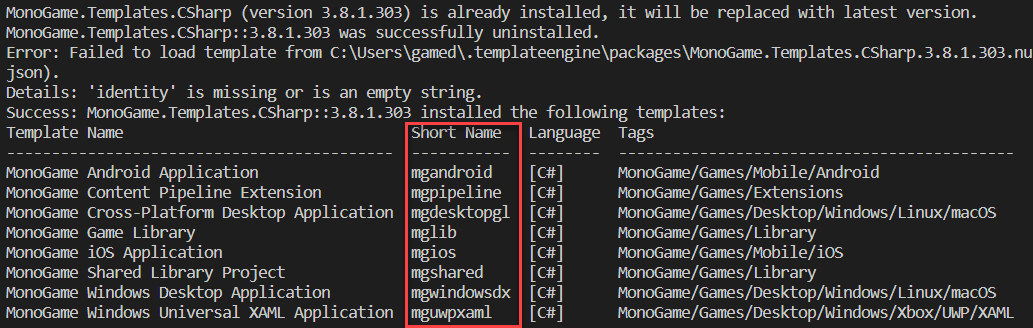
I did note in testing that the .NET 7 SDK no longer needs the
--(double dashes) before the “Install” argument, but in a good and true backwards-compatible fashion, it still works. But I leave it in all instructions as it is still needed if you are using the .NET 6 SDK.
The highlighted parts are the template IDs which you need for creating new projects, so keep an eye on them for reference.
With MonoGame installed, we can get on with starting our new project!
MonoGame, Start!
From now on, when you need a new MonoGame project, this is where your journey begins, your machine is setup (unless you paved it recently or are borrowing someone else’s) and everything is ready. The steps for creating any new DotNet project are always the same:
- Create a new Folder.
- Run the DotNet new command.
- Done / Open the folder in VSCode.
I personally these days find it easier to stay within VSCode and do it all from there, but the choice is yours.
To perform this in VSCode, using the “Terminal” window you used to install MonoGame, check the directory you are in (as indicated by the left hand side of the cursor which always shows you where you are, handy eh?), and then navigate to where you want your game created and make a new folder, e.g. :
cd C:\Development
mkdir MyGame
cd MyGame
or you could swap out to your explorer/finder and do it, the result is the same.
Now, using the Terminal window IN the folder (if you used a GUI, you still need to navigate there in the Terminal, hence why I say it is easier to just use the Terminal), you then simply use the following command:
dotnet new mgdesktopgl -o MyGame
Which is comprised of:
| Tool | Description |
|---|---|
| dotnet | the DotNet command tool |
| new | I want to make a new project, please sir |
| mgdesktopgl | The MonoGame project template to use, from the list of templates installed, see the previous image above, shown in the red box |
| -o MyGame | Create a project called MyGame in a folder called MyGame |
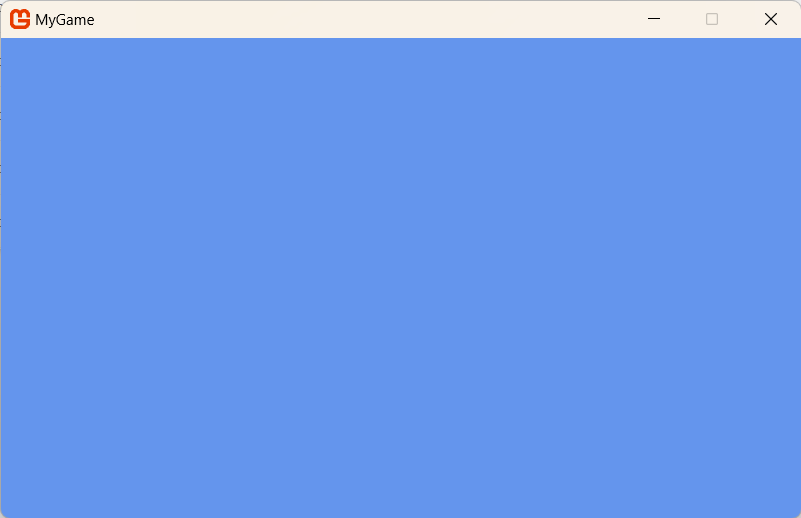
There, you now have a new MonoGame Project built and ready to use, including the MGCB content tool, it is no longer a separate install, it is built into the project itself. (I can imagine how many hours that will save me managing it separately).
All that is left is to “Open the Folder” where you created the project (the folder WITH the .csproj file in it, not its parent folder) in VSCode and off you go, editing in VSCode on the fly!
Build and Test
Like Visual Studio, all the building of a MonoGame project, no matter which platform it is, is performed by the MS Build tools, but again, thanks to the latest .NET frameworks, this is all managed by a simple command:
dotnet build
This compiles and checks your code can build, it also restores any tools, downloads any dependencies for the project, since it was last run; all in one. What you get, assuming it is successful, will be a folder structure like this:
MyGame\bin\Debug\net6.0
Comprising of:
| Path Segment | Description |
|---|---|
| MyGame | your game code folder |
| bin | the Binary output folder |
| debug | the build mode your project was compiled under (usually debug or release depending on how you built it) |
| net6.0 | the framework the project was compiled with (MonoGame is currently using .NET 6) |
In the final folder, you will find an executable of the same name as your project (MyGame.exe in my case on Windows, it will be different for other platforms) which you can run.
To create a FINAL build (because you do not want to ship debug code to customers, do you?) you simply follow the steps in the MonoGame documentation and produce a “published” build, as follows:
dotnet publish -c Release -r win-x64 /p:PublishReadyToRun=false /p:TieredCompilation=false --self-contained
Which basically commands MSBuild to generate a Release build, ready to publish and makes the output the best it can be.
If you want to read more about the “dotnet publish” command or other dotnet commands, check the official Microsoft documentation.
Done, dusted, all there is to say, is it not?
The Content Pipeline
Now, if you have read any of the documentation regarding MonoGame, you will know there is a tool for Managing / Building content separate from your project to help with compiling your project (as well as a whole bunch of other platform optimization and wonder). You do not have to use it if you do not want to, but I always recommend using it because I always liked it.
Previously, you had to install the tool separately, find a way to launch it beyond the command-line which “mostly” worked for Visual Studio, but thanks to VSCode Extensions, there are already two extensions for adding a “right-click” launch ability for the MGCB tool directly in VSCode (sadly only one works, but here is hoping the dev fixes it).
To install the extension, simply go to the Extensions view (as before) and search for MonoGame and you should see a list like the one shown below:
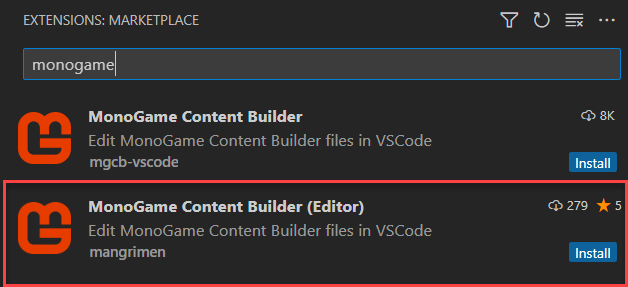
From my testing, only the second item (the one with the STARS) actually works, so feel free to install it if you wish. Once complete you will be able to open the MGCB tool by right clicking the “.mgcb” file located in the “Content” folder.
> *Note, you have to have built your project AT LEAST ONCE for the mgcb tool to be installed for your project. The tool is no longer global, which allows you to use the version SPECIFIC to your project and avoids conflict issues between versions.
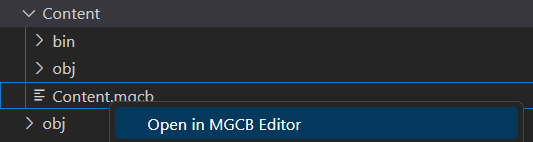
Alternatively, you can always run the following in the Terminal window for your project:
mgcb-editor Content/Content.mgcb
Debugging
VSCode also has the ability to debug .NET projects in the same way that Visual Studio can, just in a slightly different way, however, it is not on by default, you have to enable it.
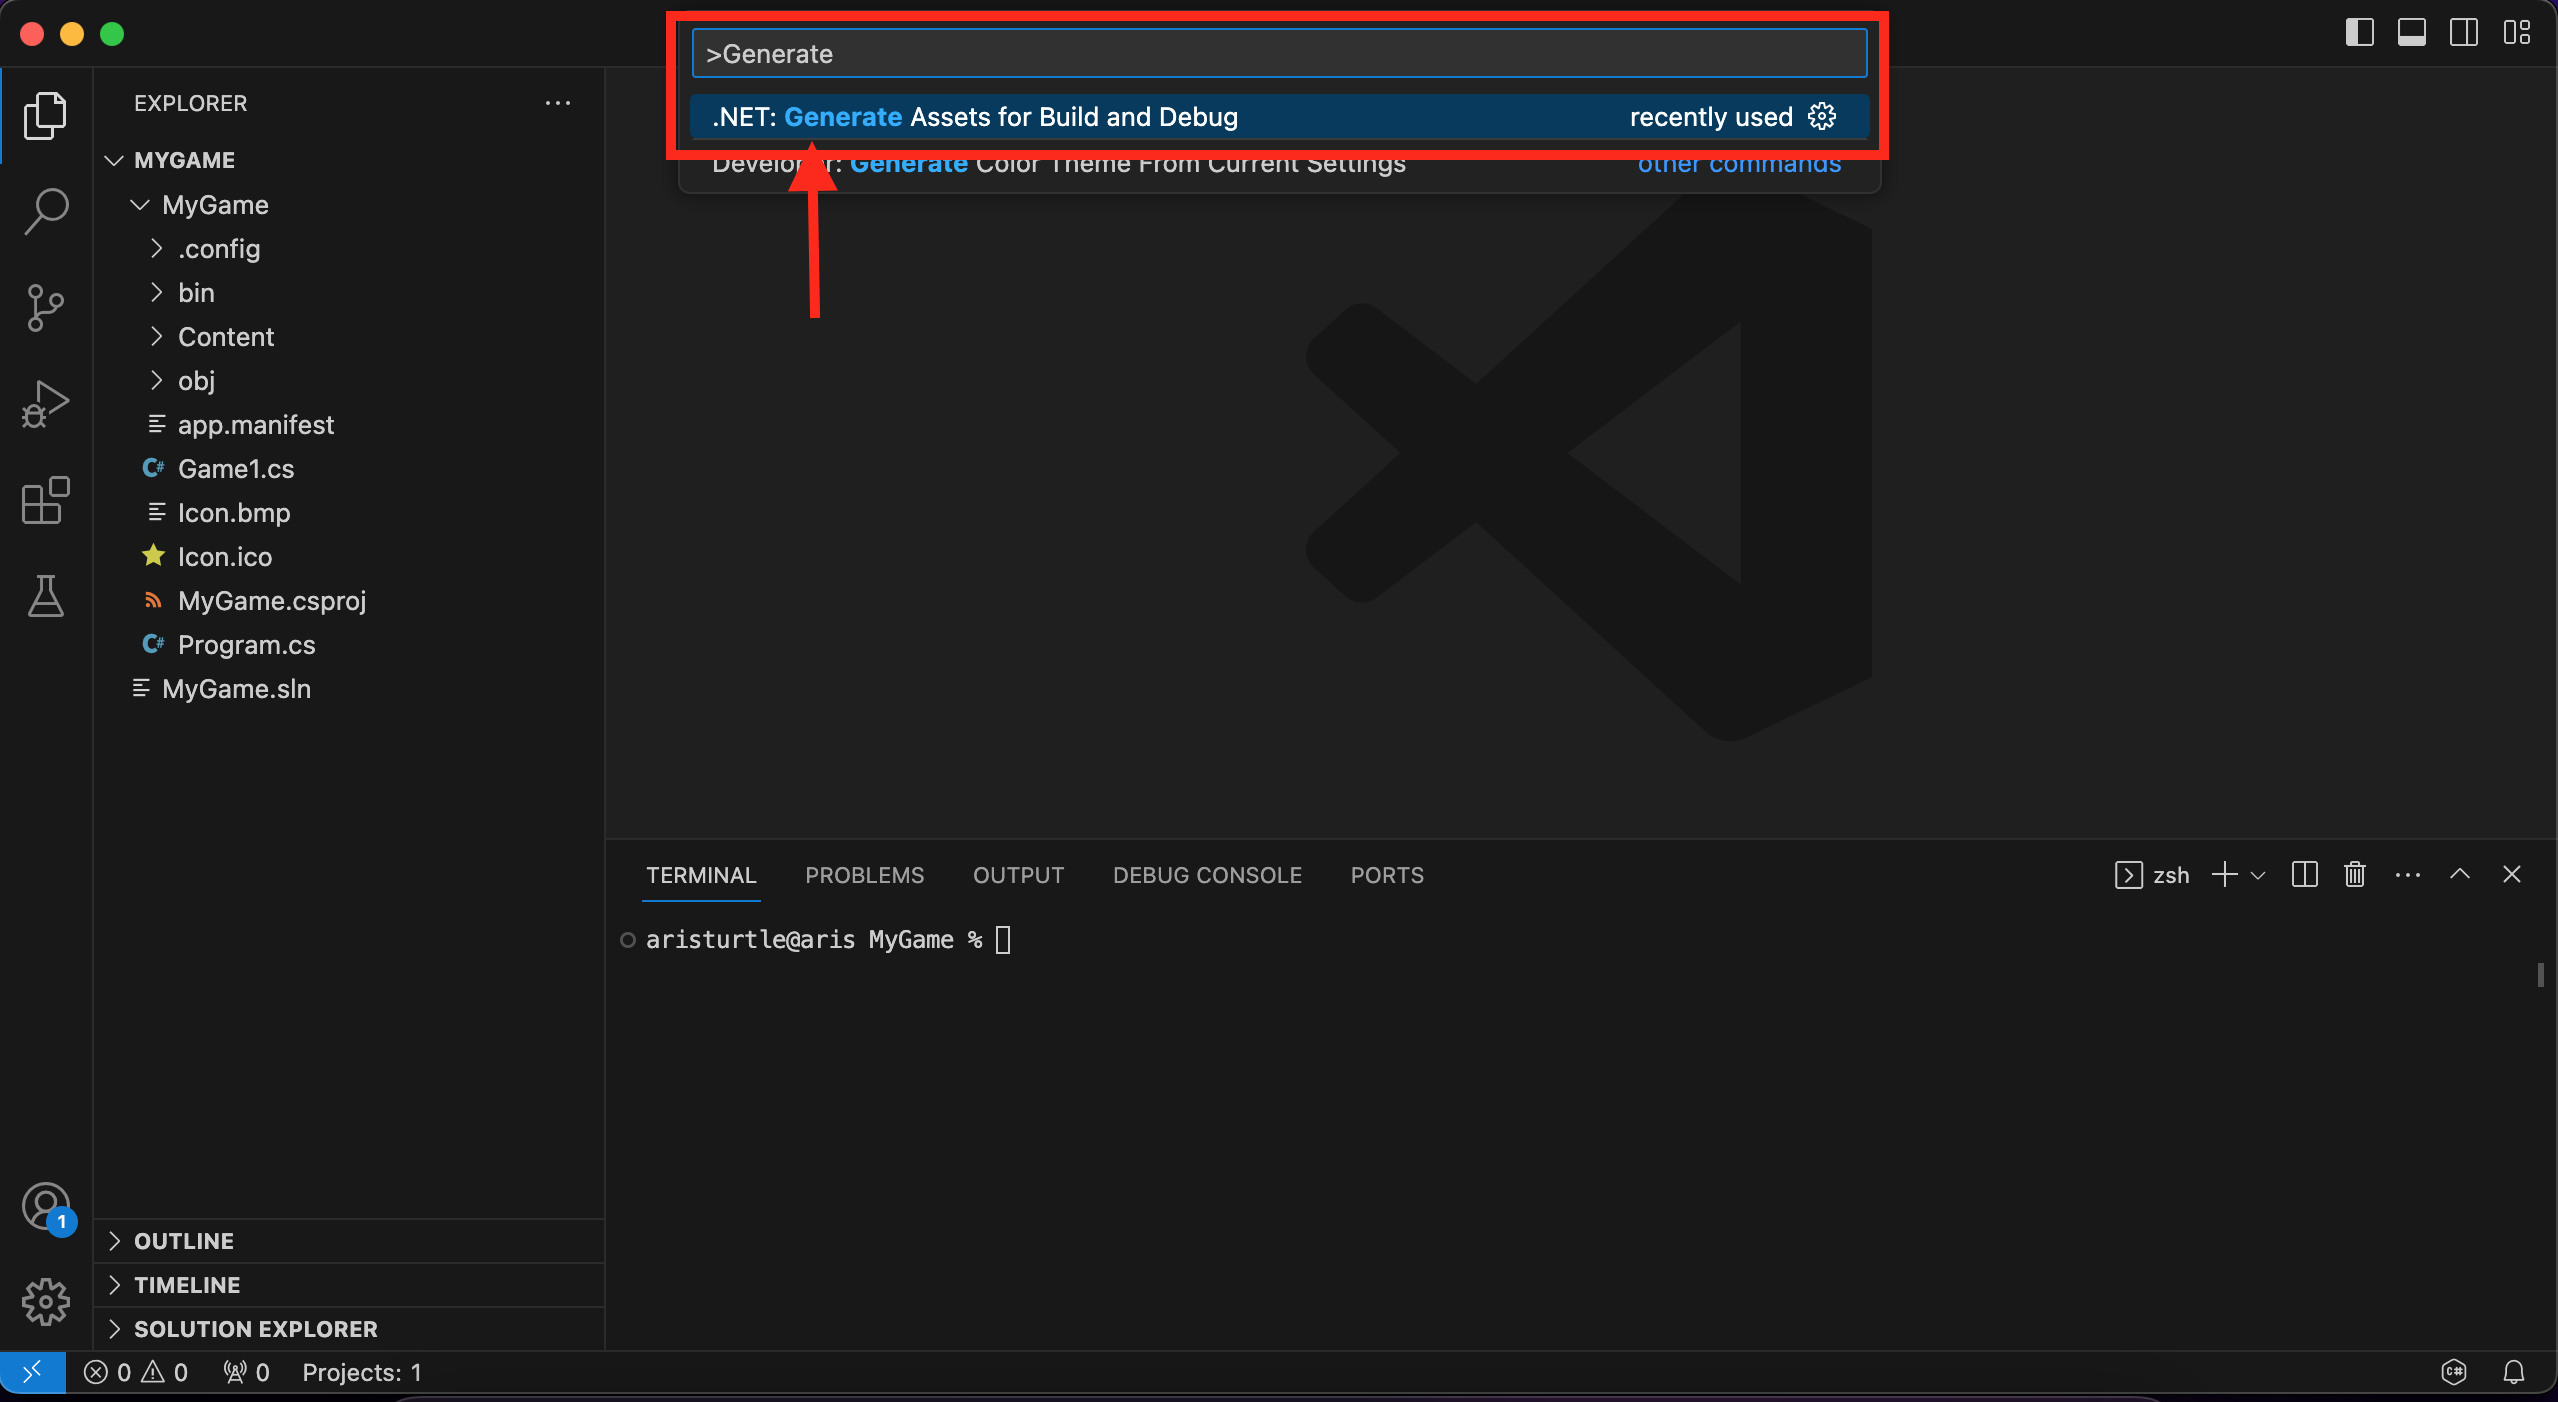
To setup debugging, open the Command Palette using
| Platform | Key Binding |
|---|---|
| Windows | F1 |
| Windows and Linux | Control + Shift + P |
| Mac | Command + Shift + P |
Once open, type the search criteria “Generate” and locate the .NET Generate Assets for Build and Debug command and click it (or hit return/enter) as shown in the image below:
This will generate the necessary “Launch Configurations” in VSCode and store them in a new “.vscode” folder in your project (do not ignore this folder if you are customizing debug/launch options in VSCode)
With that setup, you can begin to run your project in Debug mode as follows:
- Navigate to the Debug view using the Play Arrow button on the left hand side (as indicated in the below image).
- Change the “Run and Debug” mode to “
C# <your game name>” using the drop down button. (next to the cog icon). - Click on the green Play icon (as shown below) next to the “Run and Debug” selection.
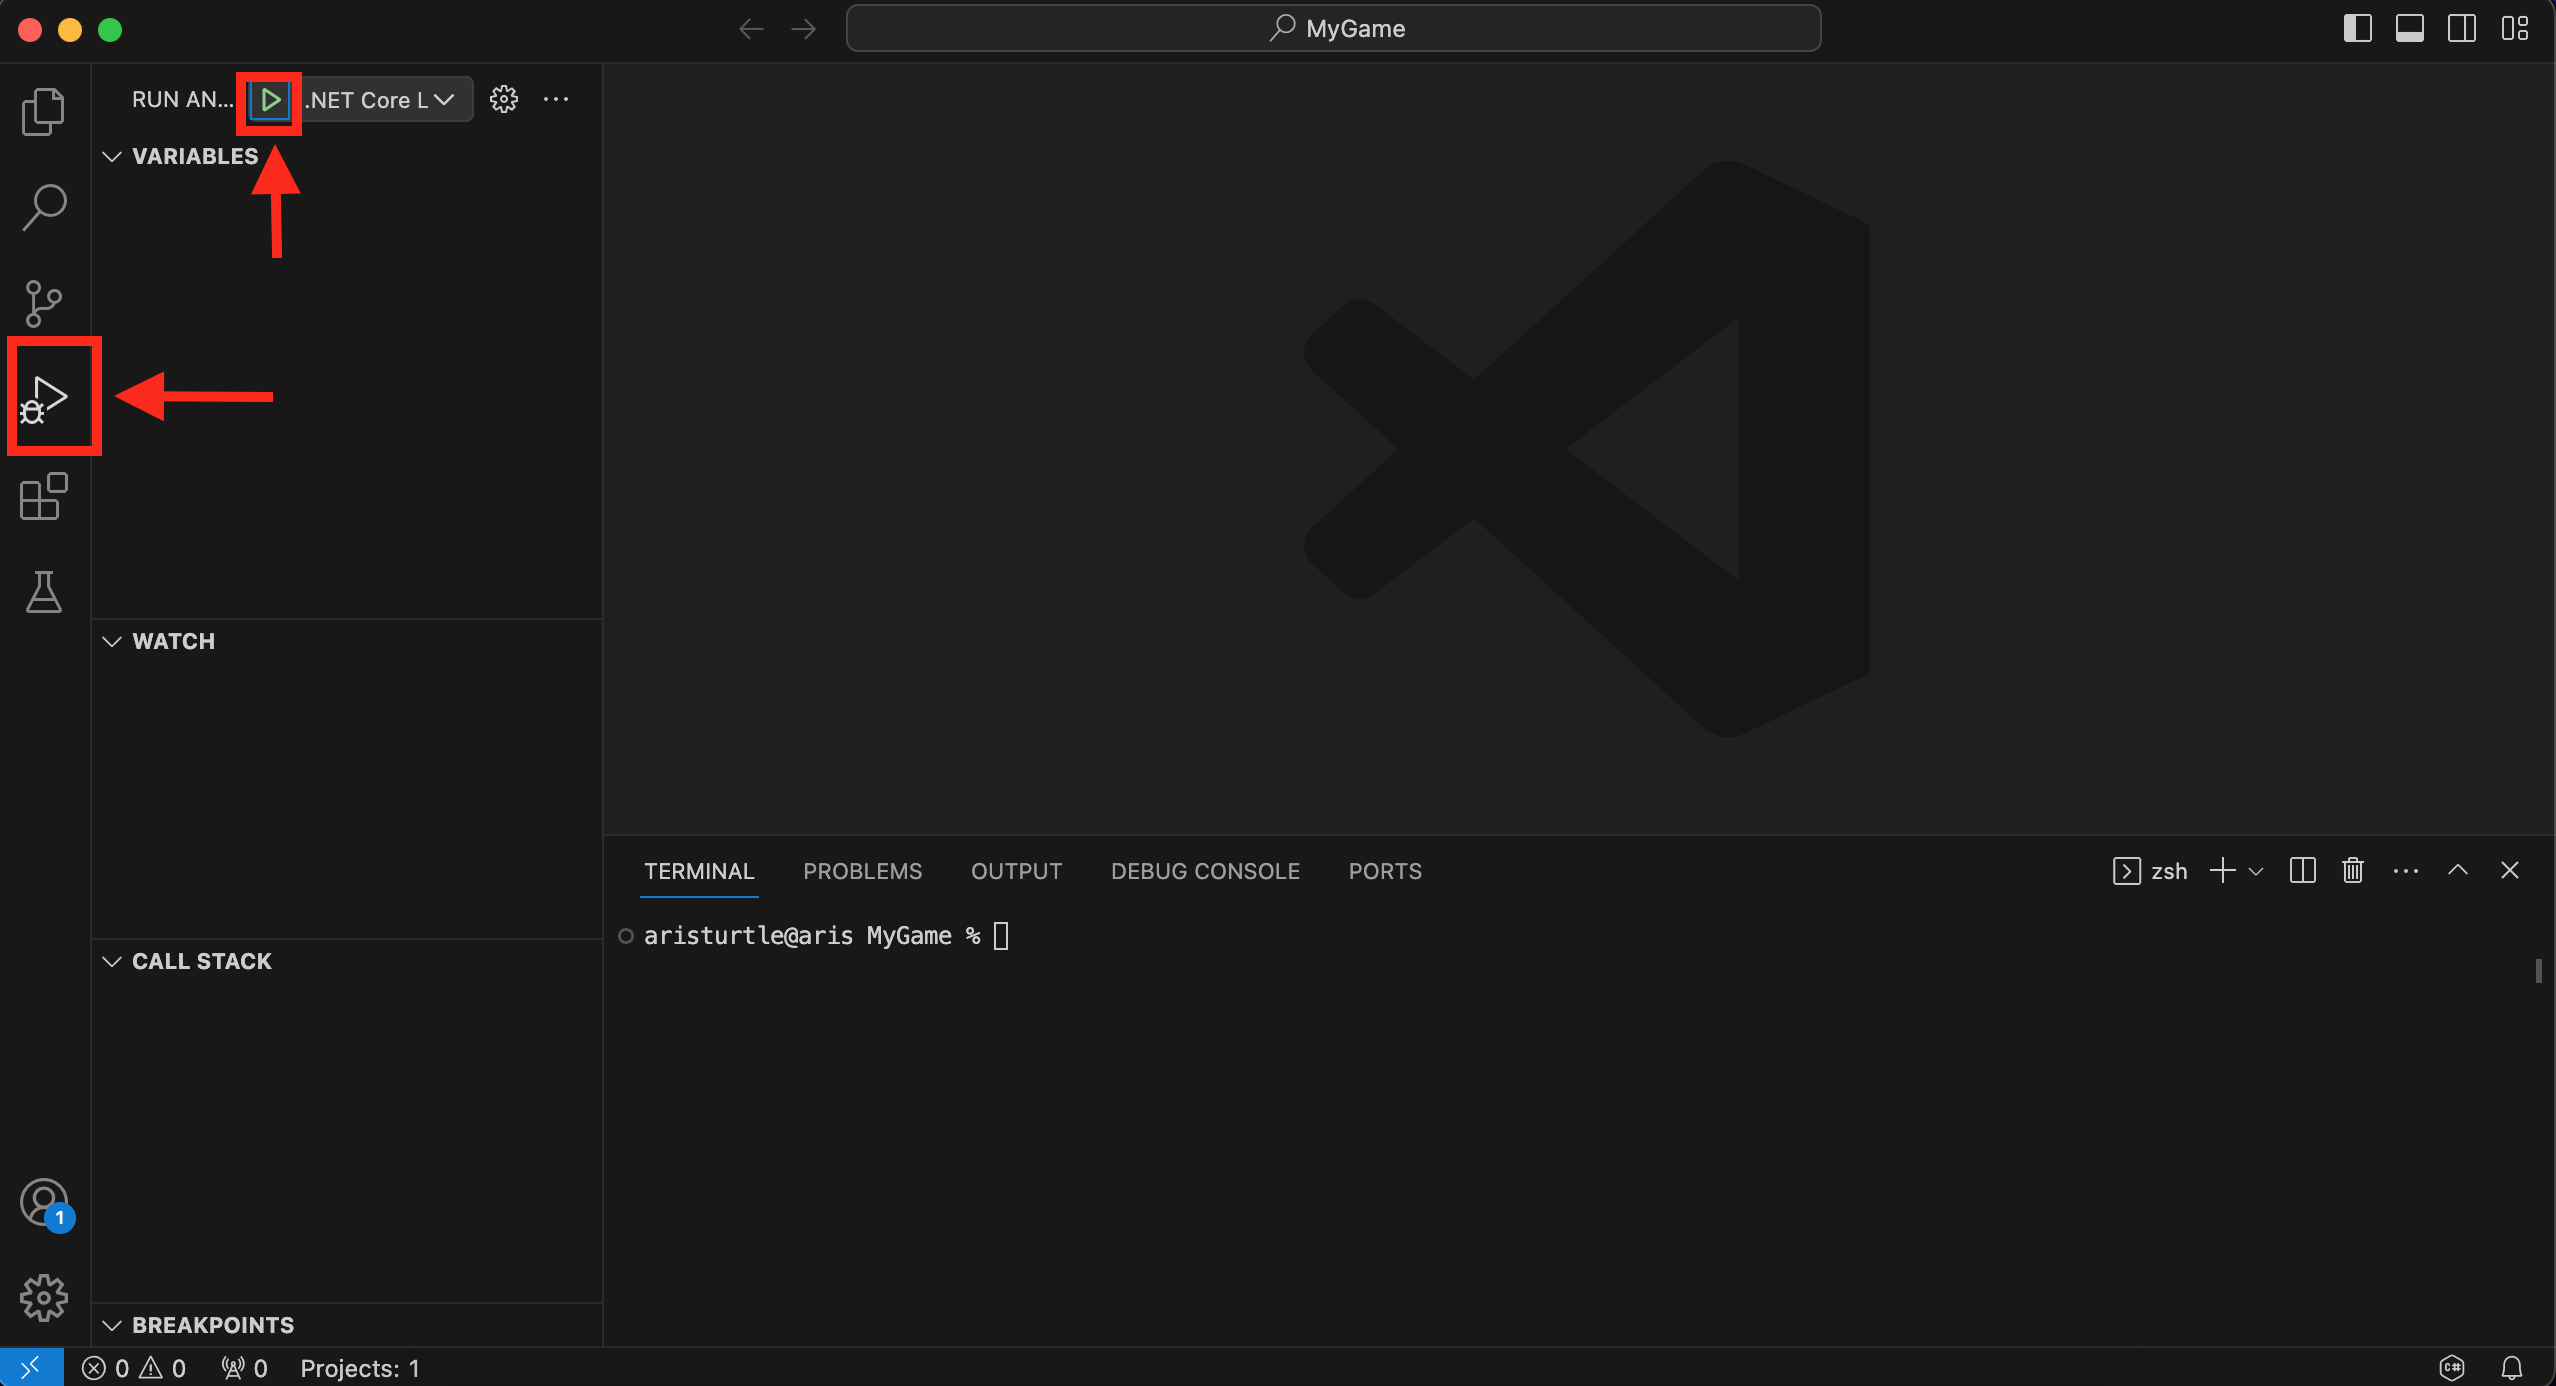
Now your game will run as normal with VSCode attached and you can Debug/BreakPoint/Catch Exceptions like the best of them.
Check the official VSCode documentation for more information for debugging with VSCode.
Summary
We have come down a long road, one that is far shorter to actually do than it was to write or even read this post. Hopefully it will help the newcomers and prepare everyone for what is to come!
Now I’m going back to the drawing board to work on more stuff, laters!!
P.S.
If you have an idea or a question that you believe would require a tutorial, visit the MonoGame tutorial series suggestions project board, and if you do not see your idea listed, then Create your own request here. All the creator community is watching and looking for your requests.